To create an App
Volumes AppStack follow these simple steps.
Log in to the App Volumes Manager Web
interface.
Click Volumes.

Click Create AppStack.

Give the AppStack a name. Choose the storage location and give it a
description (optional). Then click Create.

Choose to either Perform in the background or Wait for completion and
click Create.

vCenter will now create a new VMDK for the
AppStack to use.
Once vCenter finishes
creating the VMDK the AppStack will show up as Un-provisioned. Click the + sign.

Click Provision

Search for the desktop that will be used to install the software. Select
the Desktop and click Provision.

Click Start
Provisioning.

vCenter
will now attach the VMDK to the desktop.
Open the desktop that will be used for provisioning the new software.
You will see the following message: DO NOT click OK. You will
click OK after the install of the software.

Install the
software on the desktop. This can be just one application or a number of
applications. If reboots are required between installs that is OK. App
Volumes will remember where you are after the install.
Once all of the software has been installed click OK.

Click Yes to confirm and
reboot.

Click OK.

The desktop will now reboot. After the reboot
you must log back in to the desktop.
After you log in you must
click OK. This
will reconfigure the VMDK on the desktop.

You can now connect to the App Volumes Manager Web interface and see
that the AppStack is ready to be assigned.

Once you have
created the AppStack you can assign the AppStack to an Active Directory object.
This could be a user, computer or user group.
To assign an
AppStack to a user, computer or user group, follow these simple steps.
Log in to the App Volumes Manager Web
interface.
Click Volumes.

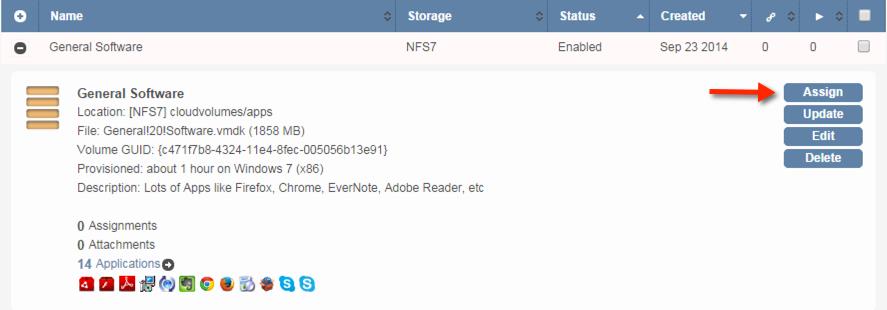
Click the + sign by the AppStack
you want to assign.
Click Assign.

Search for the Active Director object. Select the user, computer, OU or
user group to assign the AppStack to. Click Assign.
Choose either to assign the AppStack at the next login or immediately,
and click Assign.

The users will now have the AppStack assigned to them and will be able
to launch the applications as they would any normal application.

By following these
simple steps you will be able to quickly create an AppStack and simply deploy
that AppStack to your users
Comments
Post a Comment